Among numerous IBM software solutions, a rarely used, but one of the most powerful tools is hidden – Security Directory Integrator (SDI). If you hear this name for the first time, you may find the SDI the perfect solution for some of your business problems.
The SDI is not really a new tool – it has been on the market for a long time. Initially, it was created as a part of the popular Tivoli package but was later moved to the Security software package because it’s mostly used with IBM Security Identity Management and IBM Security Identity Governance and Intelligence. There are several products that SDI comes with, for instance, Security Directory Server.
The SDI is based on the IBM JavaScript engine that enables the usage of Java classes inside JavaScript code. With this, you get object-oriented programming with script execution (I know, really fancy). The programming environment is based on Eclipse. Eddie Hartman, one of the creators of the SDI, has a web page and YouTube channel with basic tutorials and how-to guides for it.
By now, you are probably wondering what the purpose of such a tool is. The answer is – integration. In today’s world of DevOps ascent, process automatization is more and more popular, and this tool is the ideal solution for it. The SDI is easy to use and includes a lot of user, reference and administration guides. There are numerous features that you can discover by using them.
What can we accomplish using the SDI?
Here are some examples of migrating data from one database to another. Precisely, we are going to migrate Db2 to PostgreSQL. The biggest problem with such migration is that different databases usually have different types of column data. For instance, if you are saving byte array in Db2 you are going to save it as BLOB, while in PostgreSQL such column is going to be of type bytea.
Let’s start with migrating only one table. Table data in Db2 looks like following:

Db2 Content Table
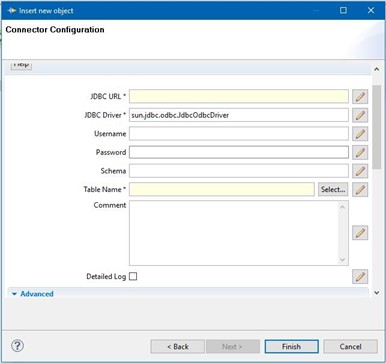
This can be accomplished with just two connectors. In the SDI, there are a lot of out-of-the-box connectors that can be used (HTTP, LDAP, File, etc.). For database connections, we are going to use a JDBC connector. Configuration is really easy – you only need to enter connection data in fields and select connector mode (is the connector going to be used as input or output). Just to mention, all configuration parameters can be stored in a predefined properties file (which supports encryption of sensitive data).

JDBC Connector
If the table doesn’t exist, the TDI can even create it. But, most of the time schema should be migrated “manually” to avoid any problem with data types.
DDL for Postgre database looks like following:
CREATE TABLE "test_content" (
    "id" DECIMAL(20,0) NOT NULL ,
    "customs_msg_id" DECIMAL(20,0) NOT NULL ,
    "date_created" TIMESTAMP WITH TIME ZONE DEFAULT CURRENT_TIMESTAMP ,
    "c_month" VARCHAR(2) NOT NULL ,
    "c_year" VARCHAR(4) NOT NULL ,
    "content" bytea ) ;
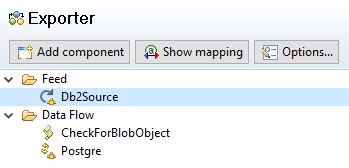
The flow in SDI looks pretty simple.

The SDI Flow
There is only one script that handles the BLOB column and contains simple code which converts byte array into String so it can be stored in the database.
task.logmsg("Checking for BLOB content")
var attrNames = work.getAttributeNames()
for(attrName in attrNames){
 task.logmsg("Cheking field " + attrName)
 if(work.getString(attrName).startsWith("[B@")){ //check if byte array
  task.logmsg("DEBUG", 'Attr '+attrName+' is byte array ' )
  work[attrName] = (new java.lang.String(work[attrName].getValue(0)))
 }
}

//lets dump our entry before writing
task.dumpEntry(work)
We are just checking for any objects whose string representation starts with [B@ that represents byte array. It is not the best method, but everything has some downsides, even the TDI (you can’t call the getClass method on such object, or even check it with an instance of because it is an array of primitive types).
Postgre connector is in the update mode, meaning if entry is not mapped, it will be created (TDI connectors in update mode works like that). That makes life easier because you do not have to worry about inserting a record if it doesn’t exist. You just have to make link criteria (define which attribute is going to be used for checking if entry is already in the database). For the output map, you just set to use all attributes.
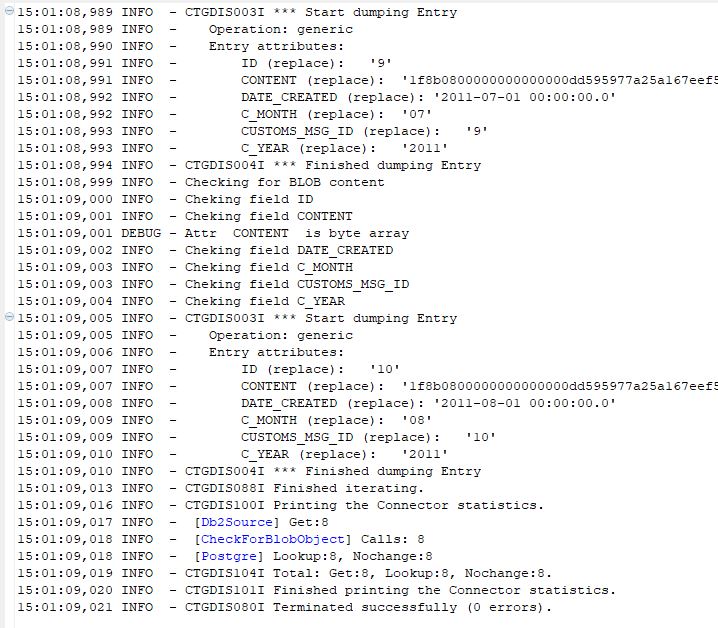
And that is it, pressing the Run button, data from Db2 is copied into the PostgreSQL database. Pretty nice, am I right?

The Run Result
Even though this is just one table for all, we need to use another assembly line that will iterate through all tables in the schema and call this assembly line with table name as a parameter. Note, we didn’t show error handling in this example which is an important part (really important)!
With this great success, we are going to finish this blog. Of course, this was a simple example. In the real world, there are a lot more complications. In future blogs, we are going to show some error handling, logging, debugging, scheduling, REST calls and all the nice things that we use on daily basis.
Falls Sie Fragen haben, sind wir nur einen Klick entfernt.

