
We have talked a lot about the Apicurio schema registry for the past few weeks and we have hopefully given you enough information on what it is, how it works and why it was our technology of choice. The last thing that is left to mention is Apicurio Registry Operator, a simple and quick way of deploying and managing Apicurio Registry on Kubernetes or Openshift.
You might ask yourself, what is an operator in Kubernetes? Kubernetes operator is an application-specific controller that extends the functionality of the Kubernetes API to create, configure, and manage instances of complex applications on behalf of a Kubernetes user. In simpler terms, Operators enable us to view applications as single objects that expose adjustments that make sense for that specific application, and not a collection of primitives (Pods, Deployments, Services, and ConfigMaps). The Operator’s role is to reconcile the actual state of the application with the state desired by the resource definition (CRD) using a control loop in which it can automatically scale, update, or restart the application. Apicurio Operator is available on Kubernetes version 1.19 or newer and Openshift version 4.6 or newer.
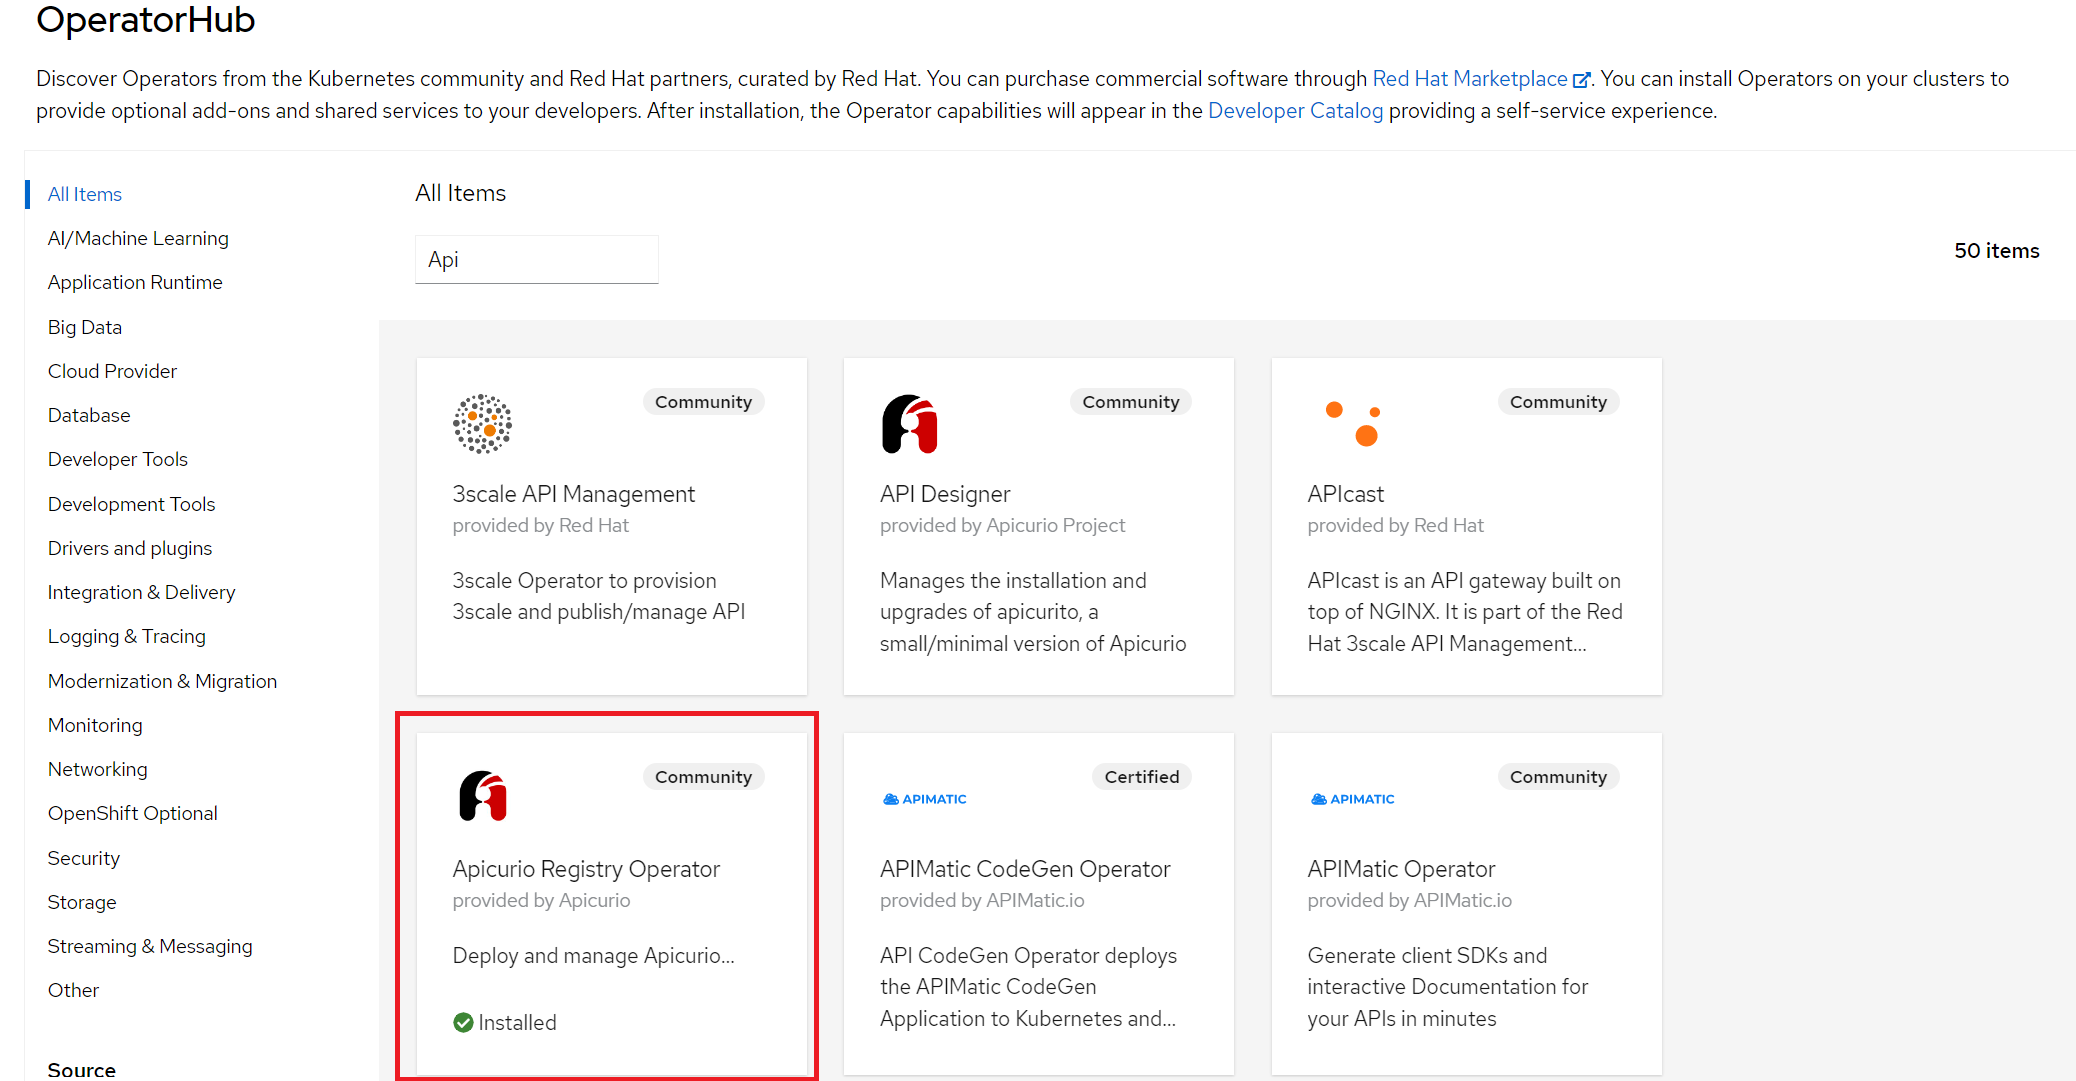
We will walk you through the installation of Apicurio Registry Operator using Openshift OperatorHub. OperatorHub is available from the OpenShift Container Platform web console and provides an interface for cluster administrators to discover and install Operators. The prerequisite for installing a registry from OperatorHub is to have cluster administrator access to an Openshift cluster.
- In the Openshift Container Platform web console, log in using an account with cluster administrator privileges.
- Choose a project in which you wish to install the operator and in the navigation menu select Operators -> OperatorHub and find Apicurio Operator.
- This will open a subscription page for that operator where we get to choose the update channel and installation mode(all namespaces on the cluster or just specific namespaces and strategy of approval for updates). It is a good idea to set strategy of approval for updates to “Manual” to prevent unplanned updates.
And with that, Apicurio Operator is available for further configuration in our cluster. Operator can also be installed from the command line using kubectl/oc (Kubernetes/Openshift command line tool) without any added complexity. The required steps include fetching the install template from Apicurio site, replacing string “{NAMESPACE}” with the namespace that we want the operator to be installed to and using the kubectl/oc tool to apply the template to our cluster in the chosen namespace. The commands to achieve all this are listed bellow.
export NAMESPACE="apicurio"curl -sSL "https://raw.githubusercontent.com/Apicurio/apicurio-registry-operator/v1.0.0/docs/resources/install.yaml" |sed "s/{NAMESPACE}/$NAMESPACE/g" | kubectl apply -f - -n $NAMESPACE |
Apicurio Registry Operator comes with Apicurio Registry version 2.0.0.Final, but there are newer versions of Apicurio Registry out there (at the time of writing this blog post the latest version is 2.4.1). If your environment requires latest and greatest from Apicurio, a custom resource definition is the way to go (writing your own “Deployment” using the desired version of Apicurio Registry).
There are various possible options when talking about underlying storage for Apicurio to store its data including Kafka, PostgreSQL, and in-memory. As an example in this blog post, we will be talking about Kafka (in our demo example Strimzi) as the underlying storage with TLS security and we will assume that your Kafka cluster is already set up and accessible from your Openshift cluster. Since we are talking about Kafka storage with TLS security, it is best practice to configure authentification and authorization for the Apicurio Registry with a dedicated user to all the topics and resources Apicurio requires. Without going into too much detail about permissions, keep in mind that Apicurio needs to be able to write data to at least the topic where it stores data. By default, Apicurio stores its data in a topic called „kafkasql-journal“ but this behavior can be changed by setting appropriate environment variables.
User
It is also best to create a Kafka Topic by hand instead of letting Apicurio create its topics when needed, so in this demo, we will create a “kafkasql-journal” topic that is needed by Apicurio.
Topic
With our user created and given appropriate permissions (this is a simple example so the permissions are extremely loose), the next step is to configure our Apicurio Registry deployment. Important configurations include persistence, which in this case is kafkasql with its necessary configurations like „bootstrapServers“ and „security“, but there are also other options like we mentioned before. Security fields include keystore and truststore for our Kafka cluster with TLS, if we had set up SCRAM we would have to define other properties required by the mechanism. One such example can be seen below.
Registry
And that is it, our Apicurio Registry is up and running. We can access the web UI that the Apicurio Operator exposed for us by checking the address of the host in the status of our deployment.
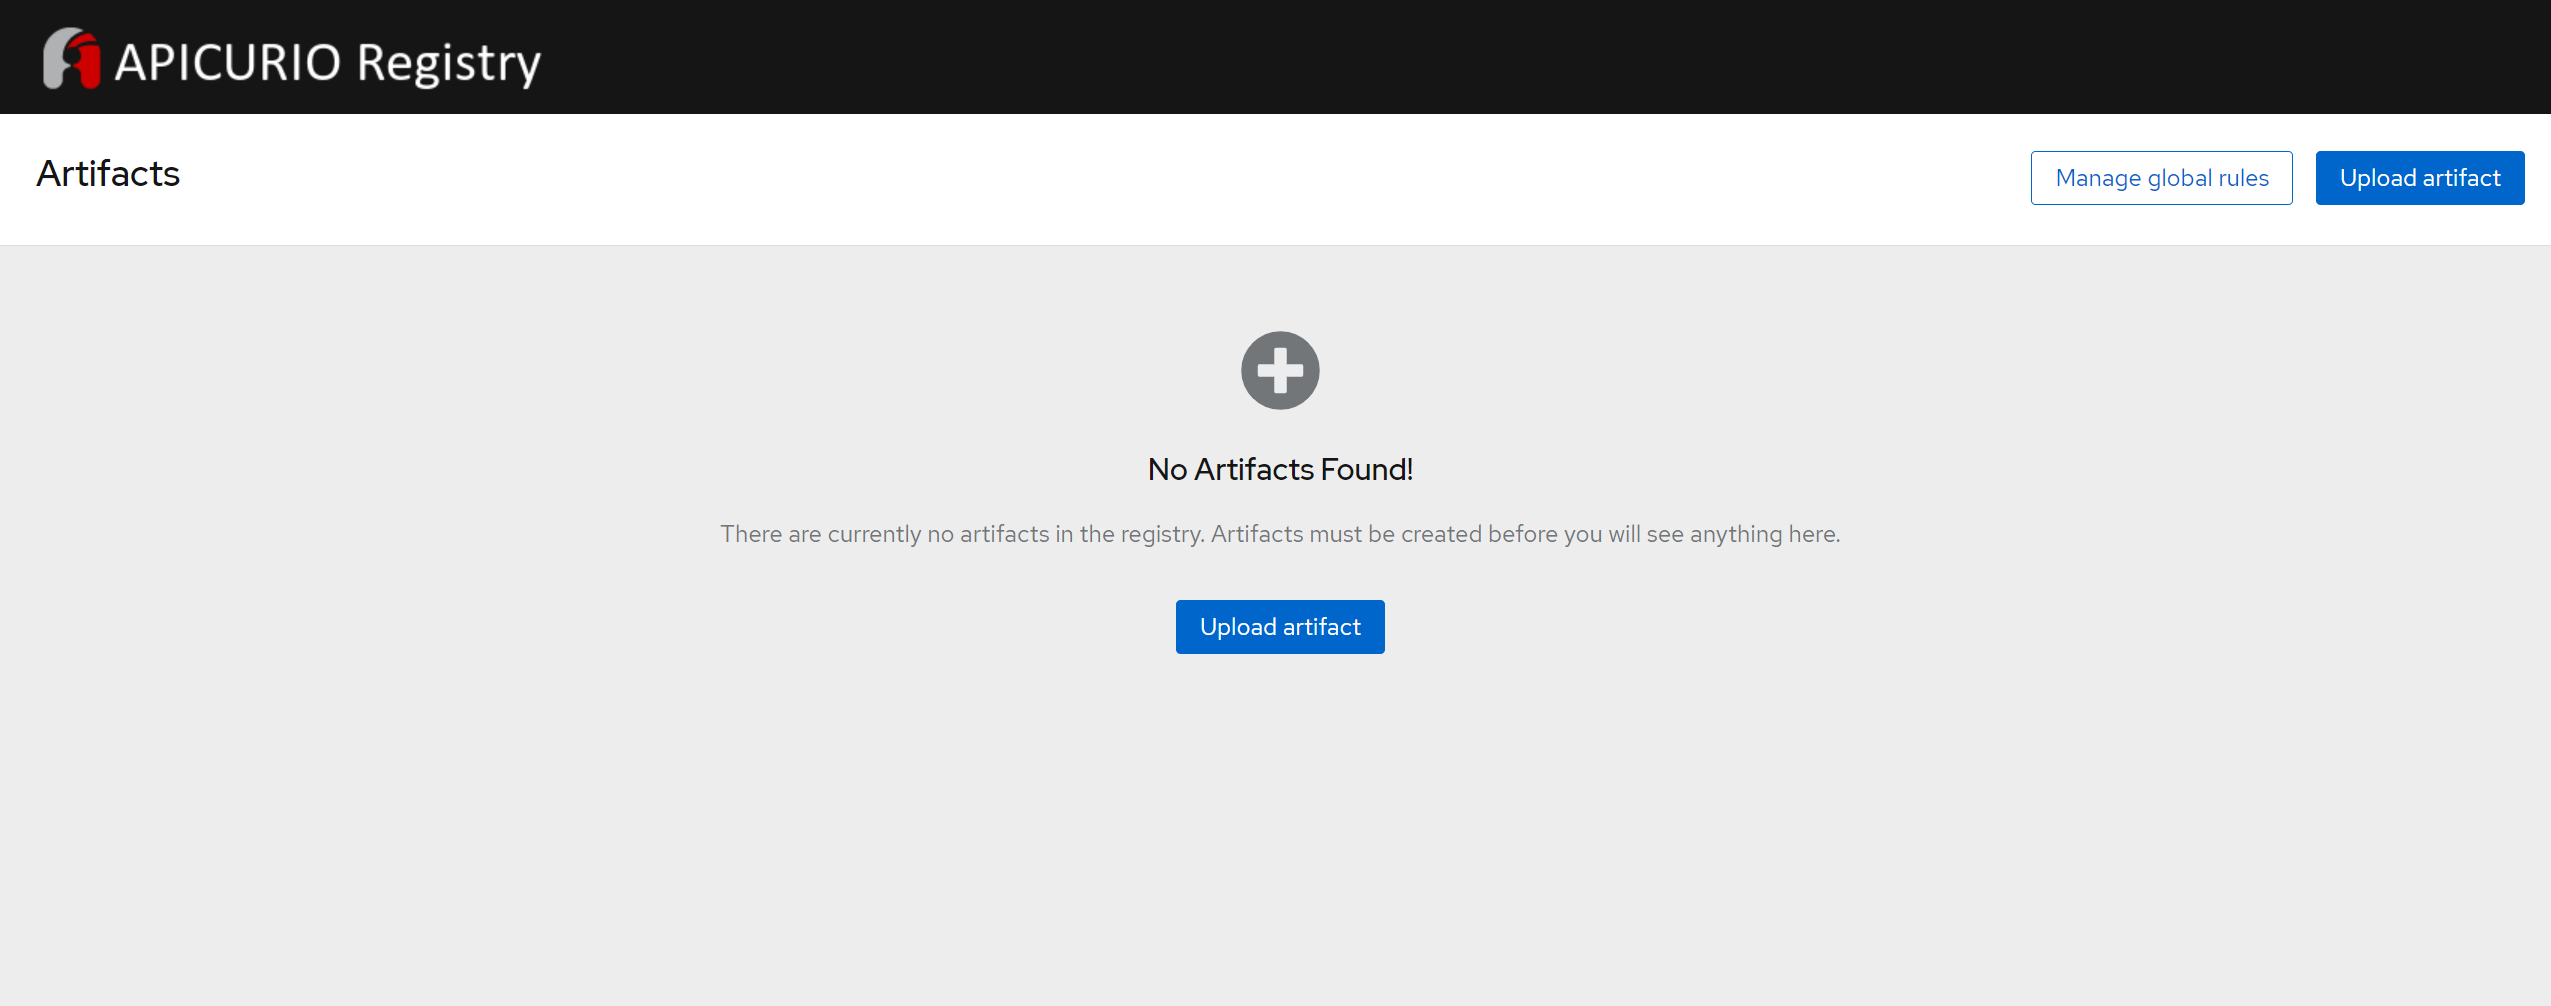
The UI is simple and easy to use. Let us demonstrate uploading an artifact to the registry. Clicking on “Upload Artifact” a new pop-up window opens looking like this:
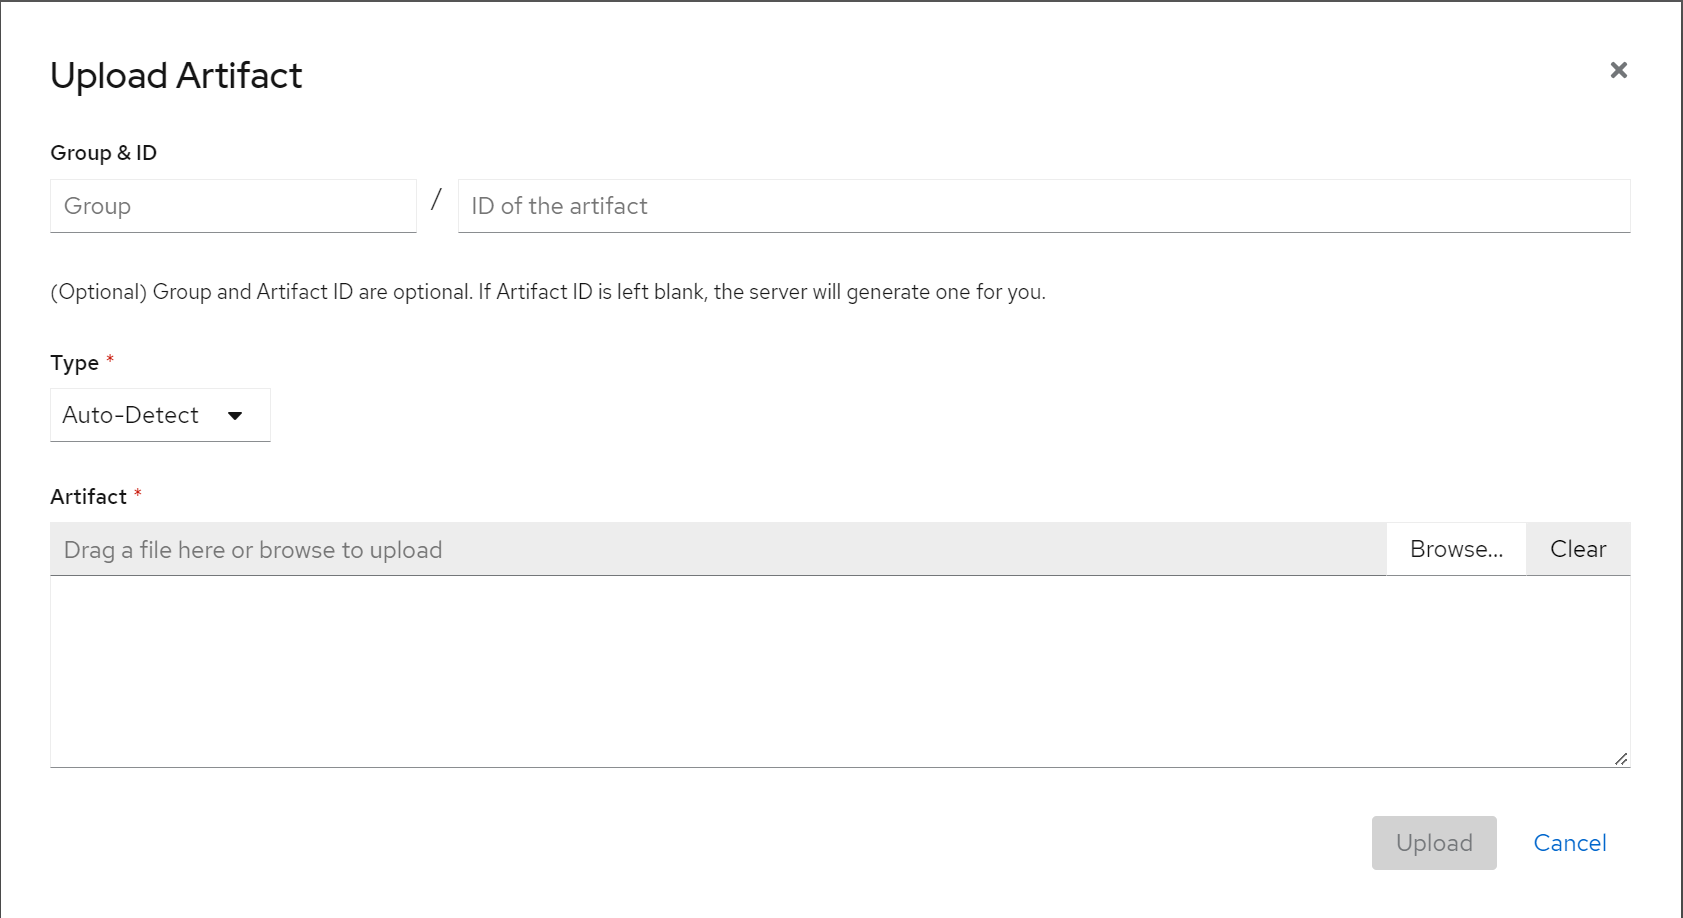
Fields “Group & ID” can be left blank and will be filled out with default settings which are “default” group and randomly generated ID. Type can be set to “Auto-Detect” or to the type of the artifact we want to upload, namely Avro Schema, OpenAPI, JSON Schema etc. The “Artifact” field is used to upload the desired schema. Let us add a simple schema looking like this and clicking upload:
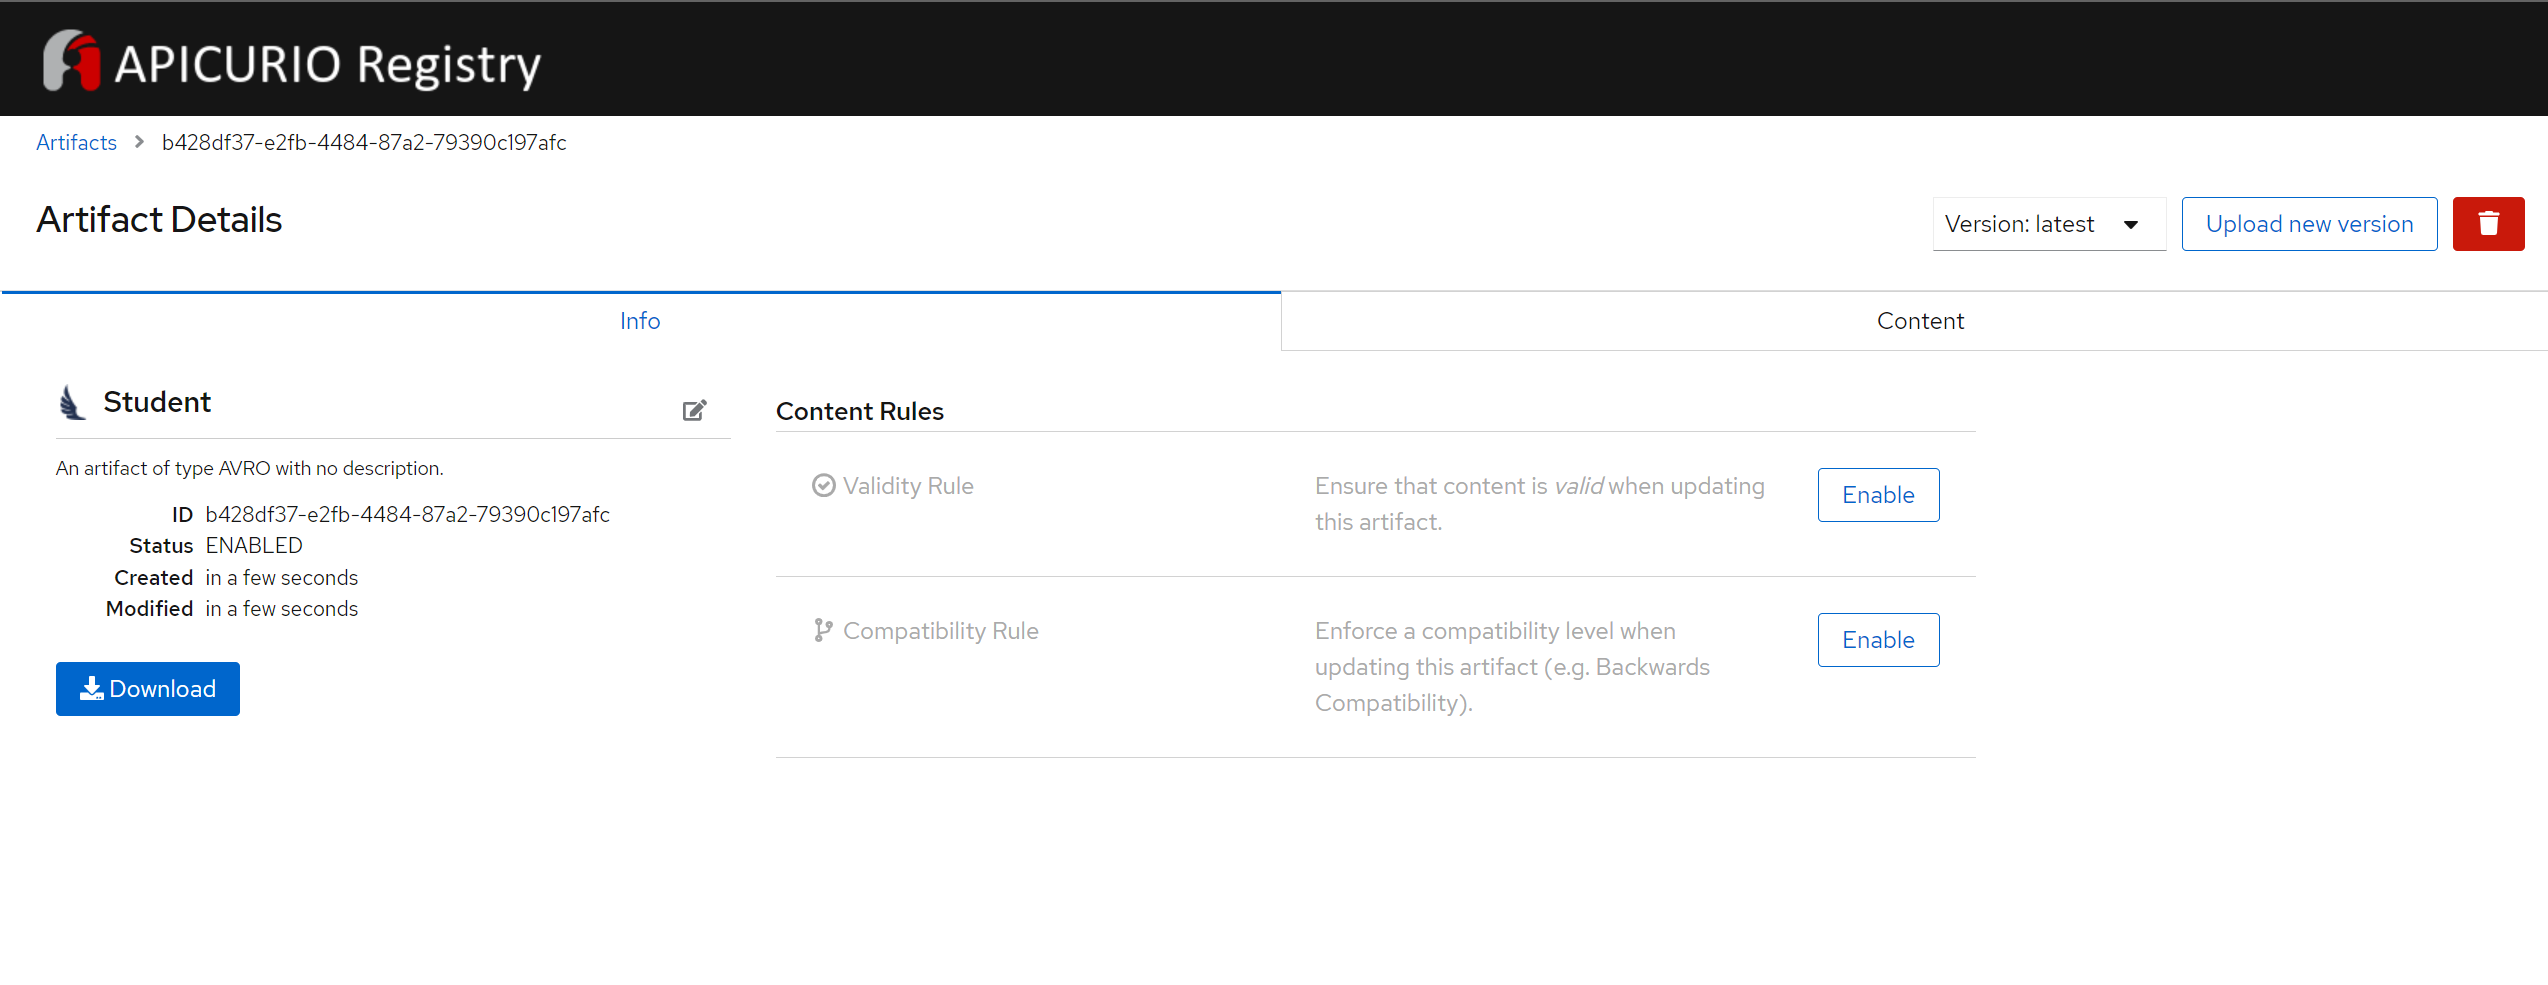
Schema
{ "type" : "record", "namespace" : "DataFlair", "name" : "Student", "fields" : [ { "name" : "Name" , "type" : "string" }, { "name" : "Age" , "type" : "int" } ]}Now we will see basic information about our schema, ID that was randomly generated for it, content, available versions and we can set validity and compatibility rules for messages using this schema.
This is by no means a production-ready setup of Apicurio Registry on Openshift but a simple demonstration of how easy it is to deploy it using Operators. If this blog got you interested in a production-ready version of the Apicurio Registry on Openshift, feel free to contact us, we will be glad to help.
With this blog we conclude schema registry blog series. We wanted to write a bit more technical series of blogs to show some of the interesting challenges we were facing and demonstrate tools and technologies we like and use on our projects.
Keep following our Medium account were we are constantly producing new blogs.
Schema registry blog series (6 of 6):