In the last article, we gave you some insight into Sencha’s tool for testing Apps built with Ext Js framework. The subject matter was capturing elements while making the tests stable and maintainable. To cut the story short, component IDs are generated dynamically and, on top of that, many testing tools don’t interpret Ext Js components, therefore capturing can cause lots of pain. Sencha Test treats UI components, not like HTML ones but rather native Ext JS.
This time the subject matter is manipulation and validation.
Manipulation
Manipulation is the second logic step and, as such, it can’t be done if the reference under manipulation is unstable. Stability has been discussed in previous article, so let’s carry on with what comes after. Naturally, manipulation is dependent on the component under operation, so you couldn’t, let’s say type some text into the button element, but you could into input element.
Button API documentation, for example, shows how button elements can be manipulated and with which methods.
// Clicking a button
ST.button('#mybutton').
          click();

// Checking a button is disabled
ST.button('#mybutton').
         disabled();
Validation
Validation in Sencha is done by:
- asserting values
- visibility of component
- comparing screenshots
Asserting values
Functional testing is a type of testing which verifies product features and validates logic behind. Basic function of a functional test is to assert actual state with expected one.
An assertion is used when data should be read, stored, and compared. In Sencha Test tool it’s achieved through expectation using expect() function.
In many cases, you would use an expectation to ensure that the results meet your postulation. An expectation is built with the expect function, which takes a value, called the actual. It is then chained to a Matcher function which takes the expected value. This determines true/false, or, in other words, pass/fail.
https://docs.sencha.com/sencha_test/2.2.0/guides/testing_applications/testing_extjs_apps.html
An example of an assertion in Sencha Test.
expect(1).toBe(1);
Looking at the upper line, the actual value (the first number in the parenthesis) should be taken from the screen and compared to the expected value. In the following examples, it’s demonstrated how basic assertion in Sencha Test is done.
The reference of the component goes first (orange) then get function with value property. The future component is referenced as future and parsed into function as an argument. In function’s body lies expectation which validates the step.
ST.textField('[name="user"]')
.get('value')
.and(function(future) {
expect(future.data.value).toEqual('John');
});
Asserting Grids
Grids could cause quite a lot of pain when tested with 3rd party frameworks, because of its rendering and performing manipulations on rows and columns. But let’s stick to the topic and proceed with assertions and looking into how a Tester could extract value from Grid and compare it to expected result.
The following example is a good demonstration of how to extract value from Ext component of Grid (which you could interpret as a table). It demonstrates how assertion inside Grid is done in Sencha Test.
There are a couple of useful API functions which are called under Grid object, some of them are:
-
.rowAt() - Returns the row given the record index.
-
.rowWith() - Returns the row given the name of the property/field and the match value.
So, let’s imagine that we need to test whether a certain job passed with “success”.
The information could be written in a table with column “Status” which indicates the status of a job.

The following code demonstrate how to achieve the mentioned scenario:
ST.grid('#processesGridId')

.rowAt(0, 30000)

.getRecord()

.and(function(row){

          expect(row.data.record.status).toEqual("SUCCESS")

})
First, the reference of Grid UI component is made, then API function “rowAt()” is called which takes the particular row from Grid.
As you may conclude from the previous examples, row is future component that is passed to function and it represents ST.grid(‘#processesGridId’).rowAt(0, 30000).getRecord(). Variable status you may get from performing Ext Component Query via browser and it represents Ext’s dataindex. In this case, it represents a column in a table.
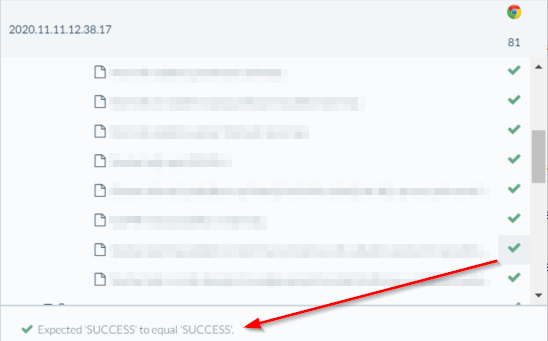
The result of test performing assertion inside Grid looks like the following:

Visibility
The visibility of components is straight-forward. The tester just needs to make a reference of an element. For instance:
ST.textField('[name="user"]')
and call function .visible()
ST.textField('[name="user"]').visible()
An argument that could be passed to visible() function is time in milliseconds which is equal to the time it takes for a component to be present on the screen.
Comparing screenshots
For screenshot comparison, a simple screenshot() function is called. A function could also be used as just screen capture, but it can get handy when the Tester needs to compare actual screen with the expected one.
ST.screenshot("System successfully saves edited values.", 7000)
Later in the process, when tests are run, the app uses the first capture as a baseline capture and all later ones are compared to the baseline. The second argument (7000) which is added is tolerance in pixels.
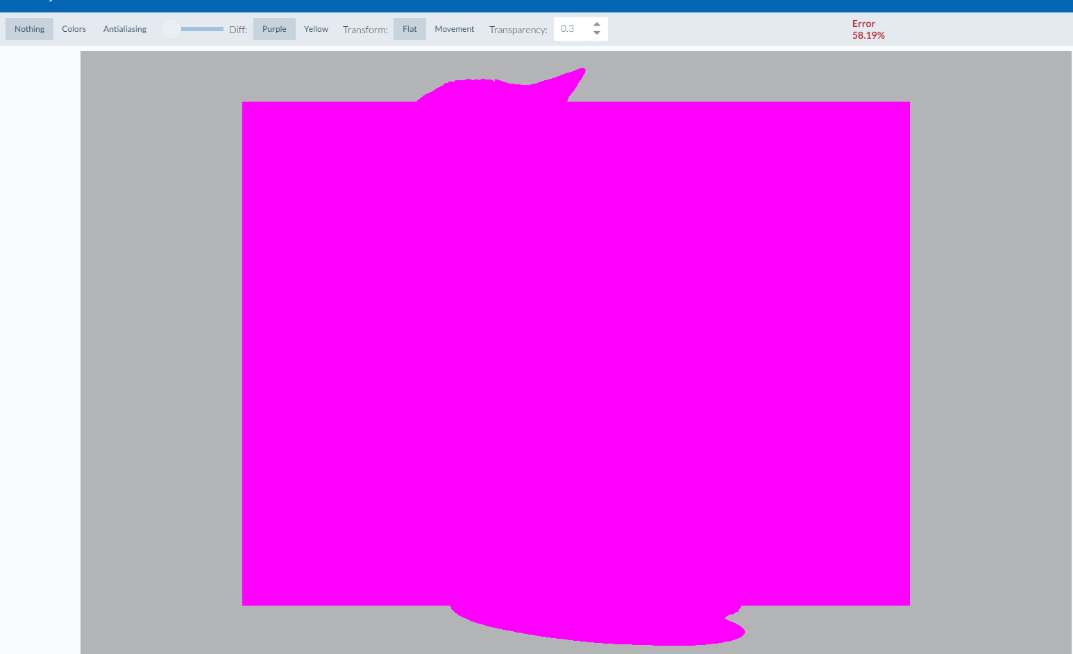
The end product of the screenshot comparison looks like following:


Conclusion
Those two functionalities (ComponentQuery, Future APIs) gives Sencha Test advantage when testing ExtJs components compared to its competition.
ComponentQuery provides solid basis to have stable tests. It provides ExtJs with attributes for components rather than relying on class attribute or ID.
APIs, on other hand, can be seen as an extension of ComponentQuery – it is an ExtJS-related specific set of functions which the Tester uses in order to perform validations – or simply do the tests.
Photo by James Harrison on Unsplash


