So you need to prepare the important IBM API Connect (APIC) demo for your client? You would like to show all the features and possibilities APIC provides and would like to set up the APIC demo environment in no time?
I guess this environment would need to be available online so demo APIs can be called by your clients during your presentation. These APIs should also be able to access Internet so they can call any publicly available REST or SOAP services your client could ask you to use for the demo purposes.
Such setup could take quite a lot of your time and effort, so this article will show you how to do it as easily as possible within constrained time limits.
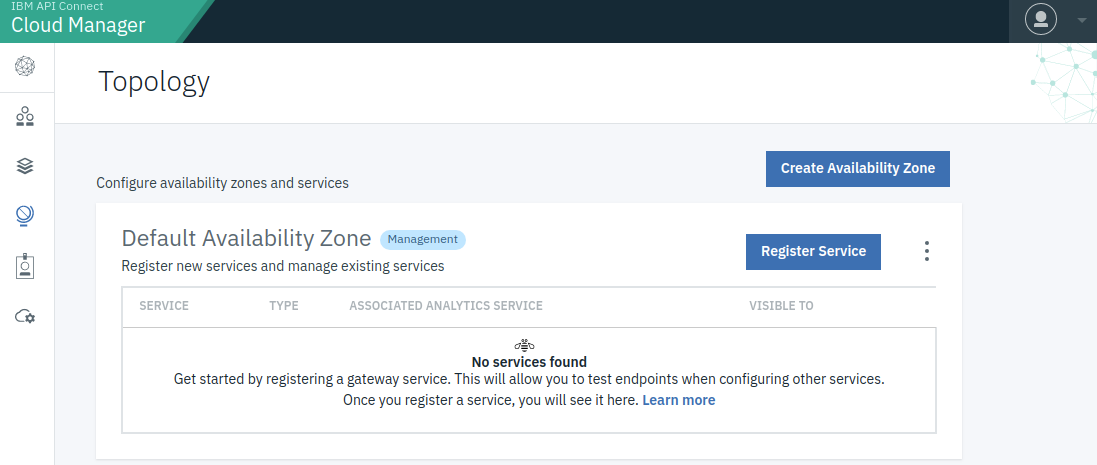
Cloud Manager Topology view on first login after automated installation done by scripts described here
TLDR / Please show me the code
For the impatient – just scroll to the bottom and check the last chapter for description and link to installation scripts.
Please be warned that you should get some basic understanding of APIC and EKS before you continue… you are warned
IBM API Connect 2018: cloud-native version of APIC
If you worked with APIC before version 2018 you probably remember that its initial installation was done by simply importing proper OVA images into your virtualization infrastructure (which could be VMware [Workstation] Player on your local machine). APIC v5 was created with 3 major components:
- API Manager (APIM + CMC)
- API Developer Portal
- DataPower Gateway
Both API Manager (APIM) and API Developer Portal components were available as OVA images. Developer Portal was Linux OS setup (with Drupal v6 and IBM APIC modules) where you could access the underlying OS directly using SSH. APIM was a virtual machine where you can’t see the underlying OS and with SSH you access the custom command-line interface where you can issue only APIC-specific commands.
DataPower Gateway was available in two flavors:
- Hardware appliance
- Virtual appliance
IBM realized that the old architecture was not flexible enough for the cloud-native world so they rearchitected APIC into a cloud-native product which can be deployed in many different cloud environments using today’s top of the line container orchestration products (Kubernetes, IBM Cloud Private, OpenShift). APIC v2018 consists of the following components:
- Cloud Manager and API Manager
- API Analytics
- API Developer Portal
- API Gateway
While this is a much more flexible approach and is the appropriate approach for the cloud-native application it could be a bit more tedious to do the initial installation in your favorite cloud provider’s environment.
Amazon EKS
Kubernetes is de facto standard for container orchestration but with its strength comes a price to pay. While it is easy to manage containers using Kubernetes it takes a lot of knowledge to manage the Kubernetes itself. As a result of that complexity, many cloud providers started to provide their managed Kubernetes services to enable easier migration to the cloud for their customers.
Amazon Elastic Kubernetes Service (EKS) is a fully managed Kubernetes Service which was announced as generally available in the middle of 2018.
EKS with managed nodes and eksctl
In its first release, EKS provided managed Kubernetes control plane but the only way to use it was to manually add worker nodes to the cluster (EC2 instances created “by hand”). Fortunately, Amazon didn’t stop there and later provided managed node groups which makes EKS setup much easier. Even better than that, you don’t have to use CloudFormation for this setup directly, there is a command-line tool (eksctl) which makes setup of EKS fast and easy (scripting anyone?).
All you have to do to start a new EKS Cluster is one command execution, something like:
eksctl create cluster
--name CLUSTER_NAME
--version 1.14
--region AWS_REGION
--nodegroup-name standard-workers
--node-type t3a.2xlarge
--nodes CLUSTER_NODES_NO
--nodes-min CLUSTER_NODES_NO
--nodes-max CLUSTER_NODES_NO
--ssh-access
--ssh-public-key PATH_TO_SSH_PUBLIC_KEY
--managed
You need to provide the following parameters to this command:
- CLUSTER_NAME: name of you cluster
- AWS_REGION: AWS region your cluster will be deployed to
- CLUSTER_NODES_NO: number of nodes in a cluster (APIC 2018.4.1.9 can be successfully installed using only one t3a.2xlarge node though its resources (8 vCPU / 32 GiB Memory) are not satisfying the minimum resource recommendations by IBM – don’t use such setup for anything other than testing. If you add 2 such nodes resources would be more than enough, though for HA you would want to have 3 nodes)
- PATH_TO_SSH_PUBLIC_KEY: a path to public SSH key – it’s private part will be used to connect to all nodes in cluster
From the test setup trials we made, it seems that the cheapest EC2 instance you can use for APIC worker nodes is t3a.2xlarge – with less than 8 vCPU and 32 GiB memory nodes APIC installation will not work.
EKS nodes setup
After running the “eksctl create cluster” command and waiting for some time, the EKS cluster will be created and you can get a public DNS name for each node. You need that information (+ ssh private key) to connect to each node and increase max virtual memory parameter – otherwise, APIC won’t successfully start because of Elasticsearch requirements.
As you probably know, you won’t be able to configure APIC if it doesn’t have a proper email server configuration. There are activation emails you need to receive to properly setup APIM and Developer Portals. For test purposes, you don’t have to use a fully-fledged SMTP service (for example AWS SES) but can get away with any kind of test SMTP service such as a MailHog. Simply start your test SMTP server on one of the EC2 instances and use instance hostname later in APIC email server configuration.
k8s dashboard installation
After the initial EKS cluster setup, you will probably want to have a better insight into your Kubernetes (k8s) cluster. That is why you should probably install k8s dashboard (and metrics server as it’s prerequisite). Installation is quite straight forward and you don’t have to expose it to the world, you can just use
kubectl proxy
to access it for your administrative needs.
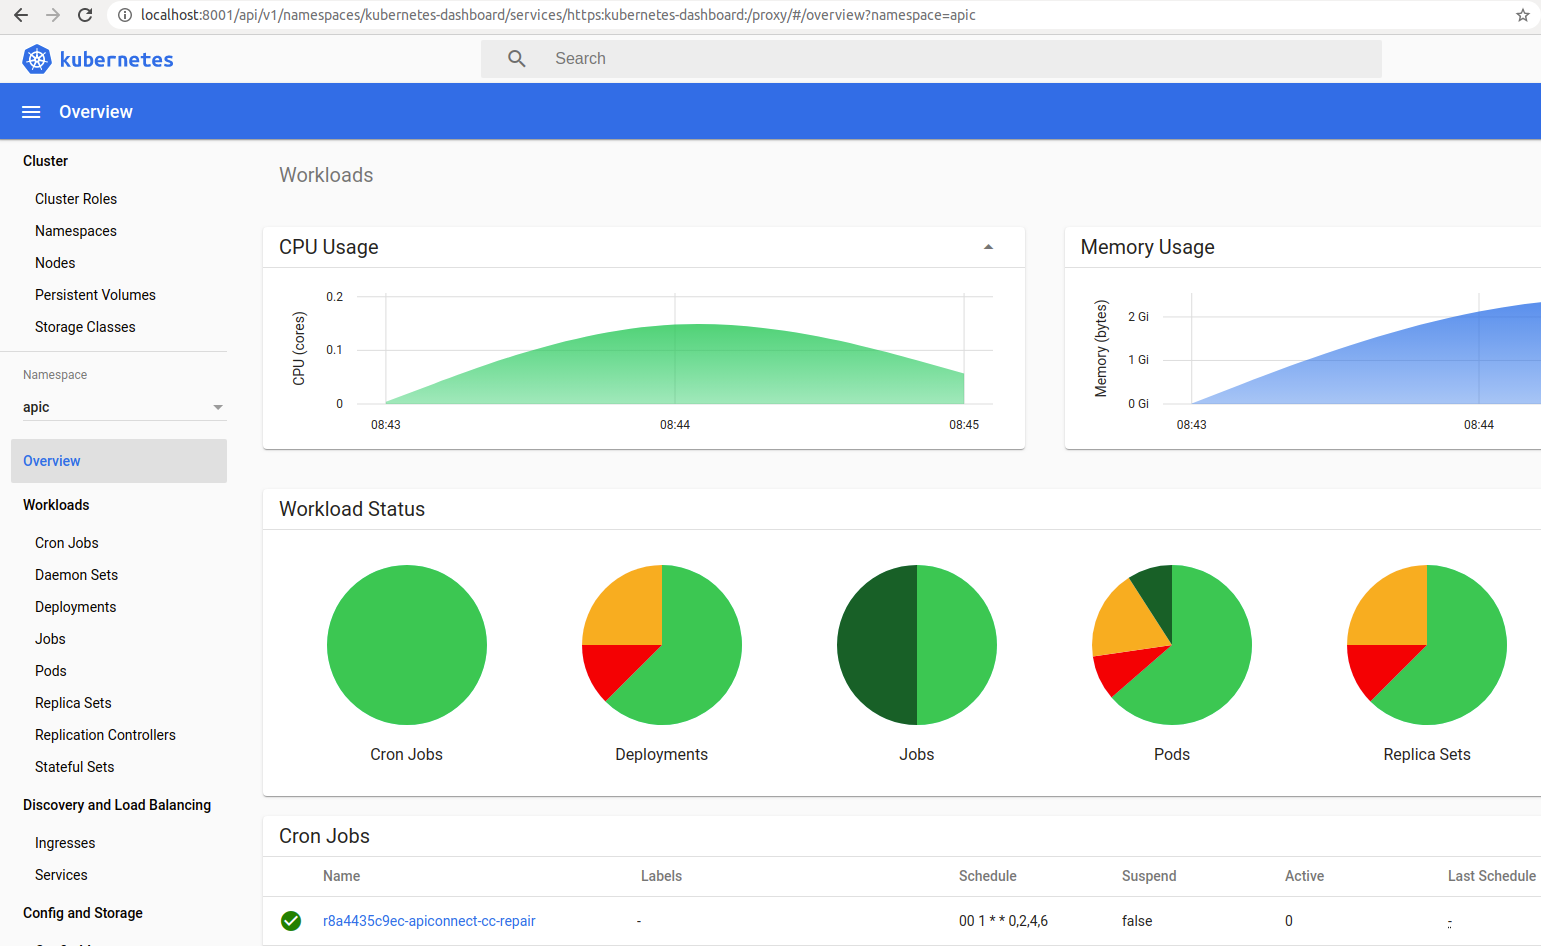
k8s dashboard’s view of apic namespace (APIC installation started)
nginx-ingress installation
You will need to access your installation from the Internet and that is where nginx-ingress comes into the picture. Properly installed helm is needed for this (helm v2 will be required by APIC installation latter, apicup command, unfortunately, won’t work with helm v3) but other than that deployment is quite straight-forward. After deployment, AWS will give you ingress DNS name available on the Internet. Ingress DNS name will resolve to as many IP addresses as many (managed) worker nodes you have configured (DNS will load balance traffic between ingress controller pods).
You could configure DNS under your control to properly resolve your nice and shiny domain name (something like “myclientdemo.mycompany.com”) to ingress DNS name (something less memorable like “a7…a8.elb.region.amazonaws.com”). Or you could just use any wildcard DNS, for example nip.io and use only 1 of IP addresses to which ingress DNS name resolves. Be warned though that you should wait for some time before getting proper IP address(es) for ingress DNS name – you need to wait a bit after deployment for DNS to propagate properly before you get “settled” IP addresses.
For example if you use nip.ip, for the following nslookup result:
$ nslookup a7..a8.elb.eu-west-1.amazonaws.com
Server:		127.0.1.1
Address:	127.0.1.1#53

Non-authoritative answer:
Name:	a7..a8.elb.region.amazonaws.com
Address: 52.1.2.3
Name:	a7..a8.elb.region.amazonaws.com
Address: 18.1.2.3
…you could use either one of following DNS name sets to configure your APIC endpoints:
*.52.1.2.3.nip.ip
*.18.1.2.3.nip.ip
APIC docker images upload
When using ECR in AWS you have to create one repository for each docker image you will push to ECR. For example, for DataPower image “ibmcom/datapower:2018.4.1.9.315826-nonprod” you will have to create an ECR repository named “datapower”.
For DataPower and DataPower monitor a process of uploading consists of 4 steps (registry=”5…0.dkr.ecr.region.amazonaws.com”):
- create aws repository ($registry/repository_name)
- docker load image
- docker tag image (for AWS repozitory)
- docker push
For management, analytics and portal docker images apicup command-line tools help you to push proper images to AWS ECR. This makes a process of pushing all images in each APIC k8s archive much easier. The version of an apicup tool determines which version of APIC are you installing so make sure the apicup version you are using is the same as a version of downloaded APIC docker image archives.
APIC installation using apicup comand line tool
If the configuration is done right and all previous steps are executed APIC installation should be quite easy using IBM’s apicup command-line tool. Once per installation, you have to do the following steps:
- Create a Kubernetes namespace
- Create a local empty installation directory for apicup
- Init installation directory using apicup
Once per each subsystem (management, gateway, analytics & developer portal), you have to do the following steps:
- Prepare all resources for subsystem
- Install subsystem into Kubernetes
APIC initial configuration
After APIC installation, you should get usable but empty IBM API Connect 2018 environment. You will have to do some additional configuration steps (probably by administrative web applications though this should not be a problem to convert this to another script if REST administrative interface is used).
Initial configuration should apply the following steps:
- Cloud manager
- Configure email server
- Register DataPower Service (Topology)
- Register Analytics Service (Topology)
- Register Portal service (Topology)
- Associate Analytics Service to DataPower Service (Topology)
- Create Provider Organization
- API manager
- Configure Gateway Service (Catalog)
- Create Portal (Catalog)
- Create or import demo product(s) & API(s)
- Publish a demo product(s) to catalog
- Developer Portal
- Create & activate a new user account
- Create demo client application
- Subscribe demo client application to a product
- Test API calls
Now when you understand it it is time to script it 🙂
Fortunately for us, all of those steps are easily reproducible using just a few scripts and a little bit of configuration. Of course, you would need command-line tools and appropriate permissions prepared to run those scripts but the end result is that in something like 30 minutes you can set up your IBM APIC 2018 initial environment and with 10 more minutes you can configure it for a proper demo session with your client
Fortunately my colleague Miroslav Rešetar gathered most of the scripts required for this task during his battle with early APIC v2018 releases installation to AWS environment which made this task much easier
Fortunately for Miroslav, Chris Phillips created a nice project which in turn made his work easier
Just make sure you have a proper working environment – bash shell and command-line tools installed:
- aws-cli
- helm (v2)
- kubectl
- eksctl
- docker
- apicup (version of apic you are installing)
With all the above-mentioned tools installed you just need to set proper configuration parameters and login into systems (AWS, k8s, docker) you need to use. This should make you ready for your fast demo environment setup. After the EKS cluster is setup and k8s dashboard is deployed you should be able to use the dashboard to check the progress of APIC installation. When all colors in dashboard turn to green (and scripts are no longer running) you can try to access your newly created APIC in EKS
All scripts required for that setup (with some additional comments) can be found at GitHub/croz-ltd/ibm-api-connect.
Note:
This setup is by no means intended for the production use (though it could be adapted for that as well).
P.S.:
Please don’t forget to delete your test EKS cluster when you need it no more to avoid unnecessary AWS costs. You can just use the eksctl command:
eksctl delete cluster my_cluster_name
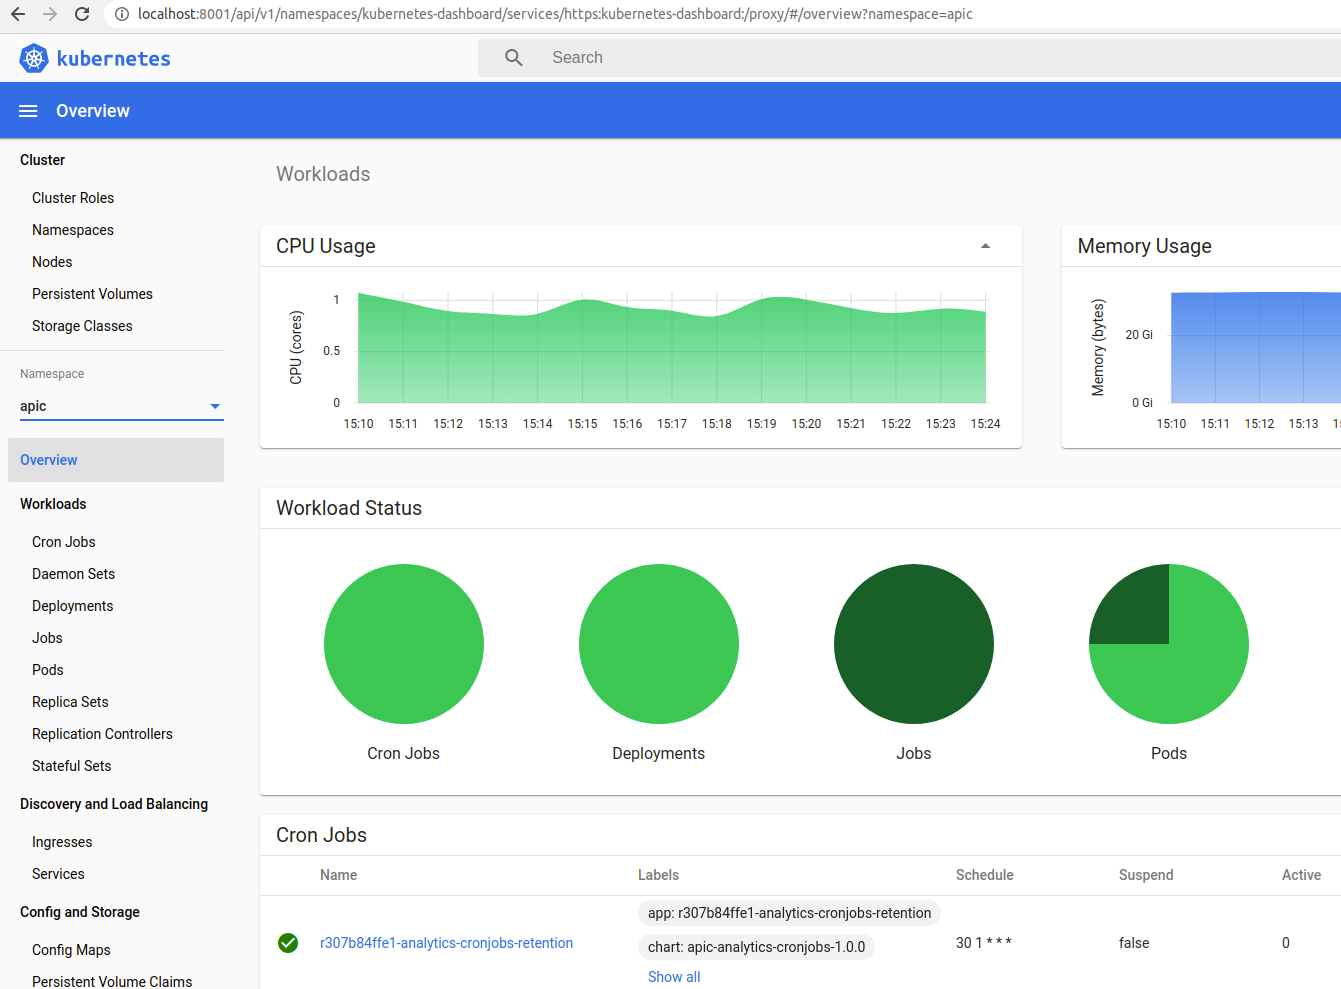
k8s dashboard’s view of apic namespace (APIC installation finished)
Whether you’re building a new IT system or transforming an existing one, we are your experienced partner! Get in touch if you need help.
Photo by Clint Adair on Unsplash